The Ultimate DIY Project: Creating a Low-Maintenance Gravel Garden
Creating a beautiful garden doesn’t have to mean hours of maintenance and constant upkeep. A low-maintenance gravel garden is the perfect solution for homeowners who want a stunning outdoor space without the hassle of traditional gardening. Not only is it aesthetically pleasing, but it’s also eco-friendly, drought-tolerant, and easy to maintain. In this blog, we’ll guide you through the ultimate DIY project of creating your low-maintenance gravel garden using GravelGlue to keep your gravel secure and your garden looking pristine.
Why Choose a Gravel Garden?
Before diving into the how-to, let’s explore why a gravel garden might be the perfect choice for you:
Low Maintenance: Gravel gardens require minimal watering, weeding, and general upkeep compared to traditional gardens. This makes them ideal for busy homeowners or those looking to reduce their water usage.
Water Efficiency: Gravel gardens are great for areas prone to drought or for those looking to create a sustainable, water-efficient landscape. The gravel allows rainwater to seep into the ground, reducing runoff and keeping your plants hydrated with less frequent watering.
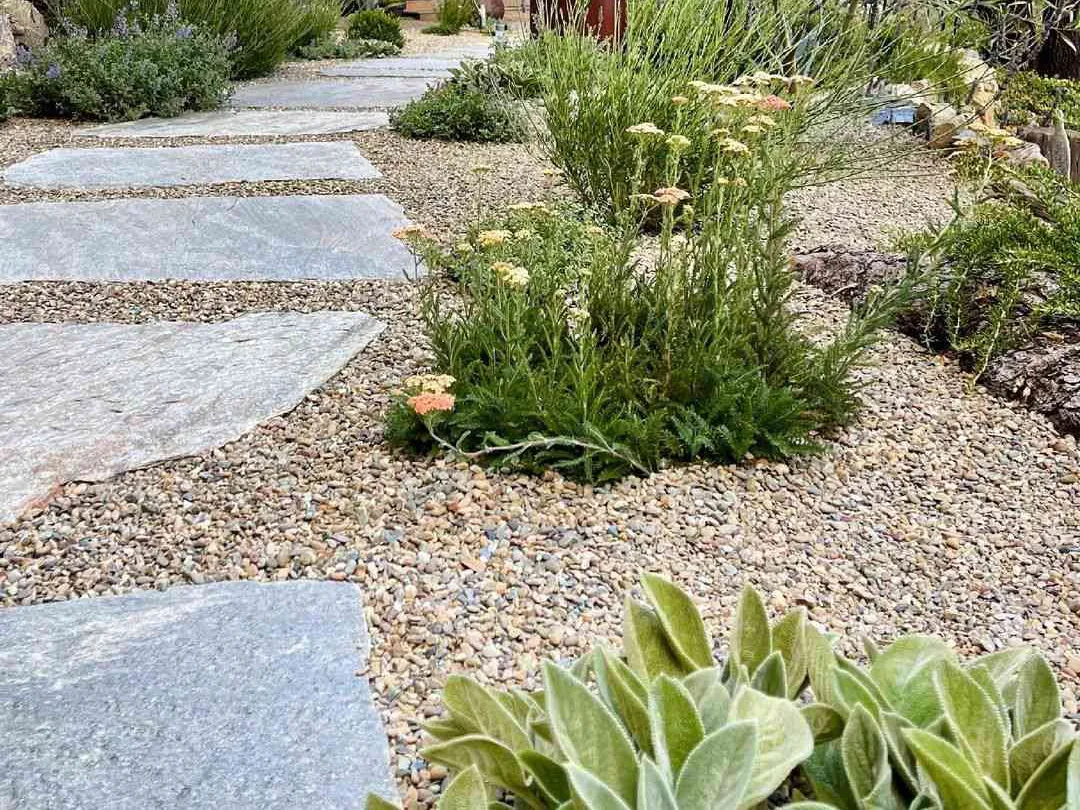
Versatility: Gravel gardens can be adapted to fit any space, from small urban courtyards to expansive rural landscapes. You can incorporate a variety of plants, from succulents to ornamental grasses, to create a garden that suits your style.
Aesthetic Appeal: The natural look of gravel pairs beautifully with plants, rocks, and other garden features. It provides a clean, modern look that enhances the overall design of your outdoor space.
Steps to Create Your Low-Maintenance Gravel Garden…
Plan Your Design: Start by planning the layout of your gravel garden. Consider the shape, size, and location. Think about where you want to place your plants, pathways, and any other features like stepping stones or sculptures. A well-thought-out design will make the installation process smoother and ensure a cohesive look.
Prepare the Ground: Clear the area of any existing grass, weeds, or debris. This is crucial to prevent weeds from growing through your gravel later on. You may also want to install a weed barrier fabric across the area. This will further reduce the chance of weed growth while allowing water to drain through to the soil.
Edge the Garden: Install garden edging around the perimeter of your gravel garden. This will help contain the gravel and give your garden a defined shape. You can use materials like metal, stone, or plastic edging, depending on your aesthetic preference.
Apply a Layer of GravelGlue: Before laying down your gravel, apply a layer of GravelGlue to the soil. This will help bond the gravel to the surface, keeping it in place and preventing erosion. Pour GravelGlue into a garden sprayer or watering can for even application. Once applied, let it cure for 24 to 48 hours.
Lay the Gravel: Once the GravelGlue has cured, it’s time to lay down the gravel. Choose a gravel size that complements the overall design of your garden—typically, 1/4 inch to 1/2 inch (6mm to 12mm) gravel works best. Spread the gravel evenly across the garden area, ensuring a depth of at least 2-3 inches to provide adequate coverage and stability.
Place Your Plants: Now that your gravel is in place, it’s time to add plants. Choose drought-tolerant species like succulents, lavender, or ornamental grasses that will thrive in a gravel environment. Dig holes for your plants, place them in, and fill around the base with gravel to secure them.
Finishing Touches: Add any finishing touches to your garden, such as stepping stones, garden ornaments, or a seating area. These features not only enhance the visual appeal but also make the space more functional.
Why GravelGlue is Essential for Your Gravel Garden
GravelGlue is a key component in ensuring that your low-maintenance gravel garden remains easy to care for over time. Bonding the gravel together prevents shifting, erosion, and weed growth, which are common issues in traditional gravel gardens. With GravelGlue, your gravel will stay in place, even in high-traffic areas or during heavy rain, reducing the need for constant maintenance.
A low-maintenance gravel garden is the ultimate DIY project for homeowners looking to create a beautiful, sustainable outdoor space with minimal upkeep. By following these steps and incorporating GravelGlue into your project, you can enjoy a stunning garden that looks great year-round with little effort. Whether you’re an experienced gardener or a novice, this project is an excellent way to enhance your outdoor living space while keeping maintenance to a minimum.
